Introduction
Are you irritated with the unpleasant blinking lights on your car's dashboard? Those signals often indicate a problem with your auto module, and the resulting heavy repair bills can be scary. But what if I told you that many of these fixes are simpler than they seem and can be tackled on your own? In this guide, we’ll walk you through the essentials of auto module repair, empowering you with the knowledge to save both time and money while boosting your confidence as a car owner.
1. Identify the Problem with Your Auto Module
Recognizing the issue with your auto module is the first and arguably the most important step in the auto module repair process. It's like a detective deciphering clues at a crime scene — you need to pay attention to the signs your car is giving you.
Is your check engine light on? Are your car's performance and gas mileage declining? These can all be signs of a malfunctioning auto module. Remember, your auto module is the brain of your car. It controls various functions such as fuel injection, ignition timing, and idle speed control. So, if it's not functioning ideally, your car won't either.
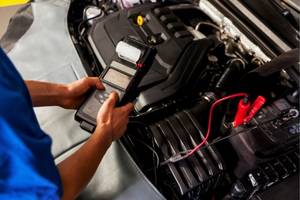
A word of caution: Don't jump to conclusions. For instance, a check engine light doesn’t always mean a faulty auto module. It could be something as simple as a loose gas cap or as complex as a failing catalytic converter. You may have to use a vehicle diagnostic tool to read and interpret the fault codes. These tools are usually compatible with most cars and are available at most auto parts stores.
Here's your first taste of auto module repair: understanding the problem. By having a clear understanding of what's wrong, you'll avoid fixing what isn't broken. This isn't just about saving time and money—it's about becoming a more informed and capable car owner.
So, now that you've identified the problem, what's next? You guessed it: gathering the necessary tools for your auto module repair. But we'll save that task for our next section. Until then, keep your detective cap on and your diagnostic tool handy!
Now that you've cracked the code on what's wrong with your auto module, it's time to roll up your sleeves and prepare for the repair. But before you dive in, you'll need the right tools for the job. This is where your journey into auto module repair really begins!
Think of this as your personal auto module repair kit. Here's what you'll need:
- Vehicle diagnostic tool: You've already used this to identify the problem, but it will come in handy throughout the repair process.
- Socket set: This is a must-have for anyone working on a car. It's used to remove and replace the various nuts and bolts in your auto module.
- Screwdrivers: You'll need both flathead and Phillips screwdrivers. Remember, using the right size screwdriver can make all the difference!
- Wire strippers and crimpers: These tools are used for handling the electrical wiring in your auto module.
- Multimeter: This will help you test the electrical components of your module.
- Soldering iron: For those more complicated repairs, a soldering iron can be a lifesaver.
- Protective gloves and eyewear: Safety first, folks!
Remember, quality matters. Invest in tools that will last. Going cheap might cost you more in the long run if you end up with stripped screws or damaged parts.
Now, that your tools are ready, you're all set to tackle the next step: executing the repair process. We'll explore this exciting phase in the next section. So, keep your tools close and your enthusiasm high – you're one step closer to becoming a master of auto module repair!
3. Execute the Repair Process
Alright, you've done your prep work, you've got your gear, and you're ready to get down to the essentials of auto module repair. It's time to pop the hood and put those tools to use!
Going Under the Hood
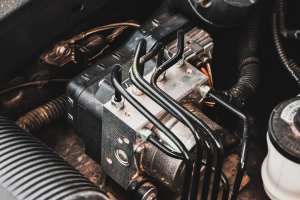
First things first, you'll need to locate the faulty auto module. Every car is a little different, so consult your vehicle's manual if you're having trouble finding it. Once you’ve found it, use your socket set to carefully remove the module.
The Art of the Repair
Now, it's time to dive into the repair itself. Here's a step-by-step rundown:
- Inspect the Module: Look for any visual signs of damage. This could be anything from burnt components to loose connections.
- Test the Electrical Components: Use your multimeter to test the module's electrical components. This will help you precisely exactly what needs fixing.
- Repair or Replace: Depending on what you find, you might be able to repair the component with your soldering iron. If the damage is too severe, you'll need to replace the part entirely.
- Re-assemble: Once the repair or replacement is done, it's time to put everything back together. Make sure you tighten all the bolts and screws.
Congratulations, you've just performed your first auto module repair! But hold your horses – we're not quite done yet. We still have one very important step left: testing the module post-repair. So, let's jump into that, shall we?
4. Test the Module Post-Repair
So, you've done the hard part and completed your auto module repair. Now, it's time to see if all that elbow grease paid off. Let's move on to the post-repair testing phase.
The Power-Up Test
Firstly, reconnect the battery and start your vehicle. Listen for any unusual sounds and keep an eye on your dashboard for any warning lights. If everything seems normal, you're off to a good start. But don't celebrate just yet, we still have a couple more tests to conduct.
The Road Test
Next, you'll want to take your car for a spin. This isn't an excuse to hit the open road—just a short drive around the block will be sufficient. Pay attention to the vehicle's performance. Is it running more smoothly? Are there any uncommon noises? If everything checks out, you can breathe a sigh of relief—your auto module repair was a success!
The Long-Term Test
Finally, keep an eye on how your vehicle performs over the next few days or weeks. Sometimes issues related to auto module repair don't show up immediately, so it's important to stay attentive. If everything continues to run smoothly, then you can officially pat yourself on the back. You've successfully completed an auto module repair!
And there you have it, folks. The world of auto module repair isn't as daunting as it might seem. With a little patience, the right tools, and some elbow grease, even the most complicated issues can be addressed. So, what are you waiting for? It's time to get your hands dirty and bring that vehicle back to life!
Conclusion
Congratulations! You've navigated the complex world of auto module repair, from identifying issues to testing your repairs. This journey not only saves you money but also transforms you into a more knowledgeable and self-reliant car owner. The next time your dashboard lights up with a warning, you’ll be equipped to handle the situation with confidence. So, roll up your sleeves and embrace the rewarding challenge of auto module repair; your car (and wallet) will thank you.
FAQs on
Practical Steps to Auto Module Repair in 2025 : A Comprehensive Guide
-
1. What is an auto module, and why is it important?
Ans.
An auto module, often referred to as the vehicle's brain, regulates various critical functions such as fuel injection, ignition timing, and idle speed. A malfunctioning auto module can significantly impact your car's performance and efficiency.
-
2. How can I identify a problem with my auto module?
Ans.
Common signs include the check engine light being on, a decline in your car's performance, and reduced gas mileage. Using a vehicle diagnostic tool to read fault codes can help identify the exact issue.
-
3. Do I need special tools to repair my auto module?
Ans.
Yes, essential tools include a vehicle diagnostic tool, socket set, screwdrivers, wire strippers and crimpers, a multimeter, and a soldering iron. Investing in high-quality tools can ensure successful and safe repairs.
-
4. Can I perform auto module repairs myself, or should I hire a professional?
Ans.
Many auto module repairs can be performed by yourself if you have the right tools and follow detailed instructions. However, for complex issues or if you're unsure, consulting a professional mechanic is recommended.
-
5. What steps should I follow during the repair process?
Ans.
The basic steps include identifying the problem, collecting necessary tools, locating and removing the faulty module, inspecting and testing electrical components, repairing or replacing parts as needed, and reassembling everything carefully.
-
6. How can I test my auto module after repair?
Ans.
After reconnecting the battery, start your vehicle and check for any warning lights or unusual sounds. Take your car for a short drive to ensure it runs smoothly. Monitor its performance over the next few days to confirm the repair's success.