Introduction
Imagine this: you're travelling down the highway, wind in your hair, your favorite tunes blaring, and then, boom! The check engine light is continuously blinking on your dashboard. You pull over, pop the hood, and your eyes land on the ECU module. Could this be the cause of your sudden vehicular woes? If you're interested in tackling ECU module repair by experts, you're at the right place. In this comprehensive guide, we'll walk you through identifying ECU module problems, selecting the right tools, following safety measures, executing the repair, and testing your work to ensure your vehicle is back in top shape.
1. Identify ECU Module Problems
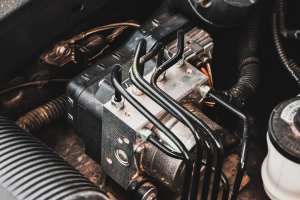
Before you can dive headfirst into any repair, knowing what's wrong is half the battle — and that's certainly true when it comes to ecu module repair. If you're confronting issues like poor fuel efficiency, erratic performance, or even total engine shutdown, there's a good chance your ECU (Engine Control Unit) module could be the culprit.
So, how do you confirm it's the ECU module? You can start by checking out these common symptoms:
- Sudden loss of power while driving: If your car doesn't seem to have the pep it once had, it could be a sign of ECU trouble.
- Engine misfiring: This can be another hint. If your engine is misfiring or stalling, the ECU module might be sending incorrect signals.
- Check engine light: If our friend the check engine light is on, it's a clear signal something isn't right.
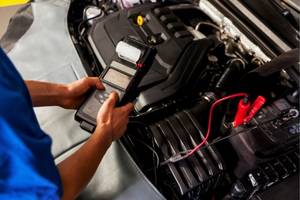
Remember, these signs are just possible indicators. So, how do you seal the deal? The answer lies in diagnostic trouble codes (DTCs). These codes are your car's way of saying, "Hey, something's up." You can access them through an OBD-II scanner, a handy tool that reads these codes from your car's computer system. If your scanner points to the ECU, it's time to prepare for some hands-on ecu module repair by experts.
In the world of ECU module repair, knowledge truly is power. By identifying the problem, you're one step closer to getting back on the road, with the wind in your hair and that check engine light a distant memory.
Stay tuned for the next step: selecting the right tools for your ECU module repair. Because as any seasoned DIY mechanic knows, the right tool can make all the difference.
Now that you've diagnosed the problem, it's time to assemble your toolbox. After all, you wouldn't show up to a picnic without a basket, would you? Similarly, you can't embark on your ECU module repair journey without the right tools.
Understand Your Needs
First things first: we need to understand what tools are necessary for an ecu module repair by experts. The nature of the repair, the make and model of your car, and even your own skill level can influence your tool selection. Here's a quick rundown of what you'll typically need:
- OBD-II Scanner: This was mentioned earlier, but it bears repeating. This tool will help you diagnose the issues with your ECU and is crucial in the repair process.
- Multimeter: This handy device will help you test the circuit and components of your ECU module.
- Soldering Iron: If your ECU module requires soldering, this tool is a must-have.
- Basic Hand Tools: This includes pliers, screwdrivers, and wrenches.
Know Where to Shop
You've got your list, now where do you find these tools? Luckily, you don't need to search high and low. Most automotive parts stores will stock all these tools. Online retailers are also a great option, and often have a wider selection.
Quality Matters
Remember, quality matters! When it comes to ECU module repair, you want tools that are going to do the job and do it well. Investing a little more upfront in your tools can save you time and headaches in the long run.
You've got your diagnosis, you've got your tools, what's next? Safety, of course! But before we get to that, remember to give yourself a pat on the back. You're two steps closer to a successful ecu module repair by experts. And that is something worth celebrating. Stay tuned!
3. Follow Safety Measures During ECU Module Repair
Safety first, always! Treating an ECU module repair with the care and caution it deserves can make all the difference. You're not just working on a machine; you're ensuring the safe operation of a vehicle that carries precious cargo—yourself, your family, and friends. Let's explore some safety guidelines that even the most seasoned ecu module repair experts follow.
Protect Yourself
Take it from an old hand, personal protection is key.
- Safety glasses: A pair of safety glasses can shield your eyes from dust and debris.
- Gloves: A good pair of gloves can protect your hands from burns, cuts, and chemicals.
- Proper clothing: Avoid loose or baggy clothing that can get caught in machinery or ignite from sparks.
Maintain Your Equipment
Taking care of your tools isn't just about longevity; it's about safety too! Regularly check your tools for any damage or wear and tear. A faulty tool can turn an ordinary ecu module repair into an accident waiting to happen.
Mind the Power
This might seem like a no-brainer, but it's crucial. Always disconnect the battery before starting your ECU module repair. Electricity and humans don't mix well—so let's keep it that way!
Clean Workspace
A clean workspace isn't just aesthetically pleasing; it's safer too. Remove any unnecessary items from your workspace to avoid slips, trips, and falls. A clean workspace is a safe workspace.
The road to a successful ecu module repair by experts is paved with safe practices. Now that you're equipped with the right tools and safety measures, you're almost ready to conquer that repair. Stay safe, and stay tuned for the next step!
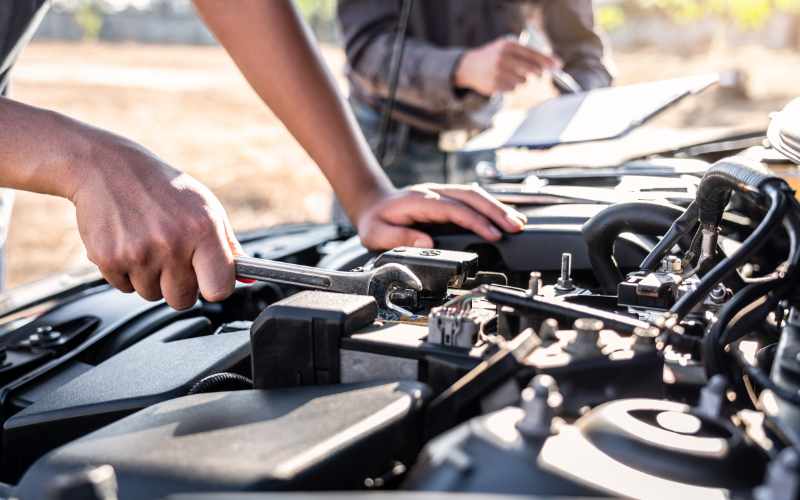
4. Execute ECU Module Repair Process
Now we're getting into the nitty-gritty of ECU module repair. This is where your expertise and preparation come to life. Similar to how a conductor leads an orchestra, you'll be guiding the repair process step-by-step. So, let's dive in just like the ECU module repair experts do.
Understand the System
Before you start tinkering, take a moment to understand the ECU system. Each vehicle has a unique setup, and the ECU module plays different roles in different vehicles. Get a grasp of where the ECU module is located, its connections, and how it interacts with other parts. This will make the repair process smoother and more effective.
Diagnose the Issue
Now that you have a handle on the system, it's time to diagnose the problem. Use a scanner tool to read the error codes. This can help you pinpoint the issue and strategize your repair process. Remember, a well-planned repair is a successful repair.
You've prepared, diagnosed, and now it's time to repair. Whether it's a faulty sensor, a corroded terminal, or a software issue, address the problem with precision and care. Follow the manufacturer's instructions and consult reliable repair guides. Take your time, and remember—patience is a virtue in ECU module repair.
Double-Check Your Work
Before you close up, double-check your work. Make sure all connections are secure, sensors are correctly installed, and software is updated. It's better to catch any mistakes now than to discover them later on.
Executing the ECU module repair process may seem daunting, but remember, every expert was once a beginner. Keep your cool, follow the steps, and your vehicle will thank you for it. Up next, we'll talk about testing and verifying the functionality of your ECU module after repair. But for now, give yourself a pat on the back—you're doing great!
5. Test and Verify ECU Module Functionality After Repair
Congratulations! You've come a long way. But hold on, we're not quite finished yet. Like the icing on the cake, the final step in the ECU module repair by experts process is testing and verifying the functionality after repair. This ensures your hard work paid off and everything is working as it should.
Fire Up the Engine
Yes, it's time to start the engine. Listen for any unusual sounds and observe how the car responds. Is it idling smoothly or are there signs of roughness? If the car is running well, it's a good sign, but don't celebrate just yet—we have a few more tests to run.
Scan for Error Codes
Bring out your trusty scanner tool again and run a scan. Are there any error codes popping up? If not, good job! If there are, don't worry. It could be a minor issue that you can easily fix. Remember, Rome wasn't built in a day, and neither is perfect ECU module repair.
Take a Test Drive
Now, for the moment of truth: the test drive. Take the car out for a spin around the block. Pay attention to how the vehicle responds to your commands. Is the acceleration smooth? Are the brakes responsive? This is your chance to see your ECU module repair in action.
Monitor the Vehicle Over Time
Finally, remember to monitor the vehicle over time. Sometimes issues don't surface immediately. If everything is still running smoothly after a week or two, you can finally let out that sigh of relief.
And that's it! You've successfully navigated your way through the process of ECU module repair, just like the experts. Remember, practice makes perfect, so don't be disheartened if you encounter a few bumps along the way. Keep honing your skills, and soon, you'll be the one sharing your wisdom with others.
Conclusion
Congratulations! You've successfully navigated the complicated process of ECU module repair. From diagnosing the initial issue to ensuring everything is functioning smoothly after the repair, you've tackled each step with accuracy and care. Remember, every expert was once a beginner, and with practice, you'll continue to improve your skills. Whether you're dealing with a minor issue or a major malfunction, the knowledge you've gained here will empower you to handle future repairs with confidence. Keep honing your skills, stay safe, and enjoy the satisfaction of a well-executed repair.
FAQs on
Expert Guide: Achieve Perfect ECU Module Repair
-
1. What is an ECU module, and why is it important?
Ans.
The ECU (Engine Control Unit) module is the computer system that controls multiple functions of your vehicle, such as fuel injection, ignition timing, and emissions control. It plays a crucial role in ensuring your car runs efficiently and safely.
-
2. What are common symptoms of a faulty ECU module?
Ans.
Common symptoms include poor fuel efficiency, engine misfiring, stalling, loss of power, and the check engine light being on. Diagnosing these issues early can prevent further damage to your vehicle.
-
3. How can I diagnose issues with my ECU module?
Ans.
You can use an OBD-II scanner to read diagnostic trouble codes (DTCs) from your vehicle's computer system. These codes will help figure out the exact issue with your ECU module.
-
4. What tools do I need for ECU module repair?
Ans.
Essential tools required for an ECU module repair are OBD-II scanner, multimeter, soldering iron, and basic hand tools like pliers, screwdrivers, and wrenches. Quality tools are important to ensure a successful repair.
-
5. What safety measures should I follow during ECU module repair?
Ans.
Always wear safety glasses and gloves, avoid loose clothing, disconnect the battery before starting, and maintain a clean workspace. Regularly check your tools for damage to prevent accidents.
-
6. How do I test my ECU module after repair?
Ans.
Start the engine and listen for unusual sounds; scan for error codes with your OBD-II scanner; take the car for a test drive; and monitor the vehicle over time to ensure the repair was successful.