Introduction
If you own a Honda, you’re well aware of the responsibility and performance that come with it. However, like any other machine, your Honda may occasionally face ECU (Engine Control Unit) issues. This guide is designed to provide you with necessary insights into quality ECU repair for Honda models. From identifying common problems to implementing effective repair techniques and maintaining ECU health post-repair, we’ve got you covered.
Faulty Check Engine Light: The check engine light is like a beacon—it signals when something is off with your ECU. If it's constantly on even when there's no apparent problem, you might have an ECU issue.
Poor Performance and Fuel Efficiency: If your Honda has suddenly become a gas guzzler or it's not delivering the performance you're used to, your ECU might be the culprit.
Unresponsive Controls: You press the gas, but the car barely moves. Or, you turn the wheel, but the car doesn't steer as it should. These can be signs of a problem with the ECU.
Stalling or Misfiring: If your Honda keeps stalling or misfiring, it's high time you checked your ECU. It might be sending the wrong commands to your engine.
Strange Sounds: If you're hearing odd sounds from your engine, it could be due to an ECU fault. It's like your car is trying to tell you something's wrong, but in a language you can't understand.
Identifying these common issues is the first step towards quality ECU repair for Honda models. Remember, knowledge is power, and being informed can save you a lot of time, money, and stress. So, how about we move on to the right tools for this task?
Now that you know what you're up against, it's time to assemble your arsenal. Selecting the right tools for ECU repair is like equipping Mario with the perfect power-ups—it's crucial for success. Let's dive in:
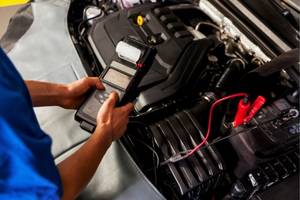
Diagnostic Scanner: This is your first line of defense when it comes to ECU repair. A quality diagnostic scanner will help you pinpoint the exact issue your Honda is facing. It's like having a translator for your car's language.
Soldering Iron: Some ECU repairs may require you to do some soldering. A good soldering iron is your best friend in this case. Just remember to handle it with care; it's not a lightsaber, after all!
ECU Repair Kit: Investing in a comprehensive ECU repair kit could save you a lot of hassle. Such kits usually include a variety of tools, such as screwdrivers, pliers, and wire cutters, specifically designed for ECU repair.
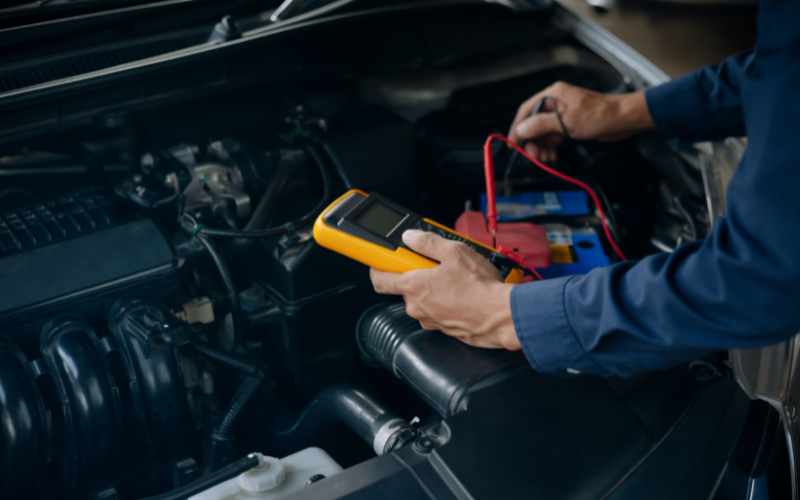
Multimeter: This handy device allows you to measure voltage, resistance, and current in your ECU. It's like having a health check-up for your ECU.
ECU Software: Certain ECU issues might require you to reprogram the unit. For this, you'll need ECU programming software. Think of it as updating your phone's OS—it's essentially the same concept.
Choosing the right tools is a significant step towards quality ECU repair for Honda models. With your tool kit ready, you're well-prepared to tackle any ECU issues that come your way. Next up, we'll delve into the best practices for diagnosing Honda ECU issues. How about that?
3. Follow Best Practices for Honda ECU Diagnosis
Now, shall we put those tools to good use? It's time to put on your detective hat and perform some quality ECU diagnosis for your Honda model. Here's how you can approach the task:
A Systematic Approach
Nothing beats going back to basics. Start by checking the basics—battery voltage, ground connections, and wiring. It's like baking a cake—you won't get a good result if you haven't mixed your ingredients right!
Use Your Diagnostic Scanner
Remember that diagnostic scanner we talked about? It's time to use it. Plug it in and let it do the talking for your ECU. It's like having your very own car whisperer!
Check For Fault Codes
Your scanner will likely return some fault codes. Don't panic—these are just clues to help you figure out what's wrong. It's like playing a game of Cluedo, but with your car's ECU.
Test Individual Components
After you've identified potential issues through fault codes, it's time to test the individual components. Use your multimeter here—it's your secret weapon for diagnosing ECU issues.
Reference the Service Manual
Your Honda service manual is a treasure trove of information. Use it to cross-reference any findings from your tests. Think of it as your very own ECU repair guidebook!
Applying these practices can significantly improve the quality of ECU repair for Honda models. With a clear diagnosis, you're now ready to move on to repair techniques. Ready to roll up your sleeves and get to work?
4. Execute Effective ECU Repair Techniques
Alright, you've done your detective work and found the culprit. Now, it's time to bring out your inner mechanic and perform some quality ECU repair for your Honda model. Here's what you should do:
Follow the Fault Code Instructions
Those fault codes you discovered aren't just for show—they're your roadmap to repairing the ECU. Follow the instructions they provide: they'll point you directly to the problem area.
Handle with Care
Remember, you're dealing with electronics here. Always handle the ECU and its components with care. You wouldn't want to turn a small problem into a big one, would you?
Those tools you've carefully chosen? Now's the time to use them. But remember—each tool has its own purpose. Don't use a hammer when you need a screwdriver!
Stay Organized
Keep your workspace clean and organized. It's easier to perform a quality ECU repair when you know where everything is. Plus, it's way more fun to work in a tidy space!
Test After Repair
Once you've made your repairs, don't forget to test the ECU. Ensuring everything is working perfectly is the final step to a successful repair.
By following these techniques, you'll be able to successfully perform a quality ECU repair for your Honda model. Now, it's time to look at how to maintain the health of your ECU post-repair. Ready to keep your ECU in top shape?
5. Maintain ECU Health Post-Repair
So, you've rolled up your sleeves, done the hard work, and your Honda's ECU is back in tip-top shape. Job well done! But wait, we're not quite finished. The next step is to ensure that your ECU stays in great shape. Let's dive into how to maintain ECU health post-repair.
Regular Check-ups
Just like you need regular check-ups to stay healthy, so does your ECU. Make it a habit to run diagnostic checks periodically. This will help you catch any potential issues before they become big problems.
Keep It Clean
A clean ECU is a happy ECU. Make sure to keep the ECU and surrounding areas free from any dust or debris. Remember, cleanliness is next to godliness!
Stay vigilant about your Honda's performance. If you notice any changes, such as sudden fuel inefficiency or unexplained engine sounds, it's time to check on your ECU.
Stay Up-to-Date
Keeping your ECU software up-to-date is key. Always make sure you have the latest updates installed. This is a simple way to prevent future problems.
Use Quality Parts
Finally, if any parts of your ECU need replacing, always opt for high-quality parts. Quality parts may cost more, but they can help ensure the long-term health of your ECU.
By following these maintenance tips, you'll ensure that your quality ECU repair for your Honda model lasts. Congratulations on successfully navigating the world of ECU repair and maintenance. Your Honda—and your wallet—will thank you!
Conclusion
Congratulations on successfully navigating the complications of ECU repair and maintenance for your Honda. By identifying common ECU problems, choosing the right tools, following best practices for diagnosis, and executing effective repair techniques, you make sure your Honda continues to deliver ideal performance. Regular maintenance and attention will keep your ECU in top shape, longlife the reliability and efficiency of your vehicle. Your Honda—and your wallet—will thank you for the effort.
FAQs on
Top Tips for Quality ECU Repair of Honda Models: A Comprehensive Guide
-
1. What are the common signs of ECU problems in Honda models?
Ans.
Some common signs of ECU issues include a continuously lit check engine light, poor performance and fuel efficiency, unresponsive controls, stalling or misfiring, and unusual sounds from the engine.
-
2. What tools do I need for ECU repair in Honda models?
Ans.
Necessary tools for ECU repair include a diagnostic scanner, soldering iron, ECU repair kit, multimeter, and ECU programming software.
-
3. How can I diagnose ECU issues in my Honda?
Ans.
Start by checking basics like battery voltage and wiring. Use a diagnostic scanner to identify fault codes, test individual components with a multimeter, and reference your Honda service manual for detailed guidance.
-
4. What are the best practices for effective ECU repair?
Ans.
Follow fault code instructions, handle ECU components with care, use the correct tools, maintain an organized workspace, and test the ECU after repairs to make sure everything is functioning properly.
-
5. How can I maintain the health of my ECU after repair?
Ans.
Conduct regular diagnostic checks, keep the ECU and surrounding areas clean, monitor your Honda’s performance for any changes, stay updated with the latest ECU software, and use high-quality replacement parts if needed.
-
6. Why is it important to use high-quality parts for ECU repair?
Ans.
Using high-quality parts makes sure the longlife and reliability of your ECU, preventing future issues and maintaining the overall performance of your Honda.