Introduction
Welcome to our comprehensive guide on mastering engine computer repair! If you've found yourself struggling with a malfunctioning Engine Control Unit (ECU), you're in the right place. This guide will walk you through each step of the process, from identifying the issue to successfully repairing or replacing the ECU. Whether you're a seasoned mechanic or a DIY enthusiast, our detailed instructions will empower you to tackle this challenge with confidence. Let's get started on this journey to restore your vehicle's performance and efficiency.
1. Identify the Problem with Your Engine Computer
Before you can even think about fixing something, you first need to understand what's wrong in the first place. So, the first step in our top-rated engine computer repair process is to identify the problem.
Is your engine light on? Have you been noticing a drop in fuel efficiency? Maybe your car isn't accelerating like it used to. Or perhaps your vehicle is stalling or failing emissions tests. These are all common signs that there might be an issue with your engine computer, also known as the Engine Control Unit (ECU).
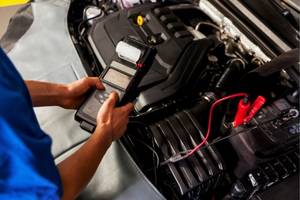
Once you've identified, with the help of these symptoms, that your ECU may be the culprit, it's time to get a bit more specific. A reliable way to do this is by using an On-Board diagnostics scanner, more commonly known as an OBD scanner. This tool can provide you with specific error codes that will indicate the exact problem with your engine computer.
For instance:
- If the code is P0601, your ECU might have a memory error.
- If the code is P0605, it's likely an internal control module ROM error.
- If the code is P0606, then your PCM processor fault is the issue.
Remember: Knowing the problem is half the battle won. With a clear understanding of what's wrong with your ECU, you're already halfway through your top-rated engine computer repair.
In the next section, we'll talk about collecting the necessary tools for your engine computer repair. Because, hey, you wouldn't go to a gunfight with a knife, would you?
Moving right along, let's talk about tools. Indeed, the right equipment can make or break your DIY repair experience. So, let's ensure you're fully armed (see, I didn't say "gunfight" this time!) for your top-rated engine computer repair journey.
OBD Scanner
First off, you'll need an OBD scanner. We've already mentioned this crucial piece of equipment earlier. It's what you'll use to read and clear error codes from your ECU. Remember, you cannot read the error codes with your naked eyes.
Next, you'll need a basic toolkit. This should include:
- A set of screwdrivers: both Philips and flathead. You never know which one you'll need until you start.
- Pliers: for those stubborn screws and bolts.
- Safety gloves: because safety first, right?
- Torchlight: for those hard-to-see areas.
ECU Repair Kit
Finally, consider getting an ECU repair kit. This kit usually comes with:
- Capacitors: for replacing old, faulty ones.
- An anti-static wrist strap: to avoid static discharge, which can damage your ECU.
- Solder and soldering iron: for those intricate repairs.
Remember, having the right tools can make your top-rated engine computer repair a walk in the park. Or, at least, a walk in a very well-lit, well-equipped park.
In our next section, we'll talk about how to disconnect and remove the engine computer. Role up your sleeves and brace yourself; it's not as complicated as it sounds!
3. Disconnect and Remove the Engine Computer
Alright—you've got your tools; you're ready to dive in, aren't you? Let's shift gears and focus on the next step: disconnecting and removing the engine computer, also known as the Engine Control Unit (ECU). It sounds like high-tech science fiction, doesn't it? But don't sweat it; with the right guidance, it's more of a dance than a duel.
Safety First
Before you begin, remember: safety first! I know, I sound like your high school science teacher—but trust me, you don't want to mess around with an engine's electrical system without taking precautions:
- Disconnect your car's battery. This reduces the risk of electrical shocks, or worse, frying your ECU.
- Wear insulated gloves. We're dealing with electricity here, folks. Better safe than sorry!
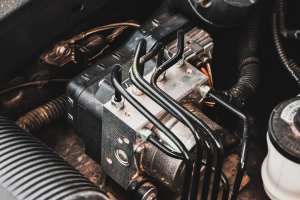
Finding the ECU
Remember, your ECU is hide and seek champion. You may find it located under the dashboard on the passenger side or in the engine compartment. If you're not sure where it is, refer to your vehicle's manual or do a quick Google search—just be sure to include your car's make and model.
Disconnecting the ECU
Now, let's disconnect the ECU. Here's the play-by-play:
- Locate the ECU's wire harness connectors. These are plastic blocks that connect the ECU to the car's wiring. They're usually bright-coloured and hard to miss.
- Press and hold the release tabs on the connectors. This will unlock the connectors from the ECU.
- Pull the connectors away from the ECU. While pulling the connectors, be gentle—you don't want to damage any wiring.
Removing the ECU
Last but not least, remove the ECU from its mount. Depending on your car, this may involve unscrewing a few bolts or unclipping some fasteners.
And voila! You've successfully disconnected and removed the engine computer. See? No rocket science involved. Next, we'll move on to the actual repair or replacement process. It's where your top-rated engine computer repair journey really begins to rev up.
4. Repair or Replace the Engine Computer
We've navigated our way to the next step of this engine computer repair adventure. Now that the ECU is out in the open, it's time to decide between repair and replacement. You might be wondering, "Wait, shouldn't I always try to repair it first?" Not necessarily! Sometimes, replacement is the quicker, more cost-effective route to achieving that top-rated engine computer repair status.
Diagnose the Damage
Before we jump into repairs directly, let's figure out the extent of the damage. You could use a multimeter to check for any obvious faults. Alternatively, an ECU testing service could provide a thorough analysis. Keep an eye out for obvious issues like:
- Burned or damaged components. These are usually easy to spot—think charred parts or melted plastic.
- Corrosion. Look for any green or white deposits on the circuit board.
Repairing the ECU
If the damage seems repairable and you're confident in your soldering skills, you might decide to fix the ECU yourself. Here's a rough guide:
- Desolder the damaged components. Remember that soldering iron you gathered? Using the soldering iron and desoldering pump, remove the faulty parts.
- Find replacements. You can usually find specifications in the ECU's service manual. If not, try searching for the part numbers online.
- Solder in the new components. Be careful not to overheat the board or you could cause more damage.
Replacing the ECU
If the damage is very severe, or if the idea of soldering makes you break out in a cold sweat, don't worry—replacement is a valid option. You can usually find a new or refurbished ECU online or at an auto parts store. Just make sure it's compatible with your car's make and model.
Confused between repair and replacement? And there you have it—the repair or replace dilemma, solved! With your ECU repaired or replaced, you're one step closer to completing your top-rated engine computer repair. Up next? Reinstallation and testing. Can't wait to see you there!
5. Reinstall the Engine Computer and Test for Success
Well, that was a wild ride, wasn't it? But you've made it through the toughest part of your top-rated engine computer repair journey. Now comes the final act—reinstalling the ECU and testing it out. Let's get ready to dive into it!
Reinstalling the ECU
Now that your ECU is all shiny and new (or newly repaired), it's time to put it back where it belongs. Here's how to do it:
- Slide the ECU back into its bracket. Make sure it fits snugly and securely.
- Reconnect the wiring harness. This is where the photos you took earlier come in handy. Match up the connectors and snap them back in place. Make sure every wire is connected as it was before removing ECU.
- Secure the ECU. Using the screws or bolts you set aside, fasten the ECU back into place.
Testing the ECU
Once your ECU is reinstalled, it's time for the moment of truth—testing it out. Here's what you should do to test your reinstalled or repaired ECU:
- Turn on the ignition. Don't start the engine just yet. Watch the dashboard for any warning lights.
- Start the engine. If all is well, your engine should start smoothly. If not, you might need to troubleshoot.
- Take a test drive. Pay attention to how your car feels. Any stuttering, stalling, or issue with performance could indicate a problem.
And there you have it! You've just completed your top-rated engine computer repair and have run a test as well. If everything went smoothly, you should now be back on the road with a smoothly running engine. If not, don't fret—sometimes, it takes a couple of tries to get it right. But with this guide in your back pocket, you're well on your way to becoming an engine computer repair pro. In case, your friends or family members come across the same issue, you can help them out with their problems, can't you? You've got this!
Conclusion
Congratulations on completing your engine computer repair! You've taken significant steps to diagnose, repair, or replace your vehicle's ECU, ensuring it runs smoothly once again. With this hands-on experience, you're now equipped with the valuable knowledge and skills to handle future ECU issues with ease. Remember, practice makes perfect, and each repair enhances your expertise. If you face any further issues or know someone else encountering similar problems, you're now the go-to expert. Safe travels and happy repairing!
FAQs on
Top-Rated Engine Computer Repair in 2025 : An Overview
-
1. What is an Engine Control Unit (ECU)?
Ans.
The Engine Control Unit (ECU) is the computer that regulates the engine's operations, such as fuel injection, ignition timing, and emissions control. It ensures optimal performance and efficiency for the engine.
-
2. How do I know if my ECU is faulty?
Ans.
Common signs of a faulty ECU include the engine light staying on, reduced fuel efficiency, poor acceleration, stalling, or failing emissions tests. Using an OBD scanner can help identify specific error codes indicating ECU issues.
-
3. Can I repair my ECU myself?
Ans.
Yes, you can repair your ECU by yourself if you have the right tools and skills. This guide provides step-by-step instructions for diagnosing and repairing common ECU problems. However, if you're not confident in your abilities, seeking professional help is advisable.
-
4. What tools do I need for ECU repair?
Ans.
You'll require an OBD scanner, a basic toolkit (including screwdrivers, pliers, safety gloves, and a torchlight), and an ECU repair kit (including capacitors, an anti-static wrist strap, solder, and a soldering iron).
-
5. Should I repair or replace my ECU?
Ans.
The decision to repair or replace your ECU depends on the extent of the damage. Minor issues can often be repaired, but severe damage might necessitate a replacement. Assess the damage using tools like a multimeter or seek professional testing services.
-
6. How do I test my repaired or replaced ECU?
Ans.
After reinstalling the ECU, turn on the ignition without starting the engine to check for warning lights. Then start the engine and take a test drive, paying attention to any irregularities in performance. This helps ensure the ECU is functioning properly.